Miniature garden, no green fingers needed!
A terrarium is a bit like having National Geographic at home: an indoor garden on your table top that can cope on its own. Such a no-maintenance splash of green is easy to create with this step-by-step guide.
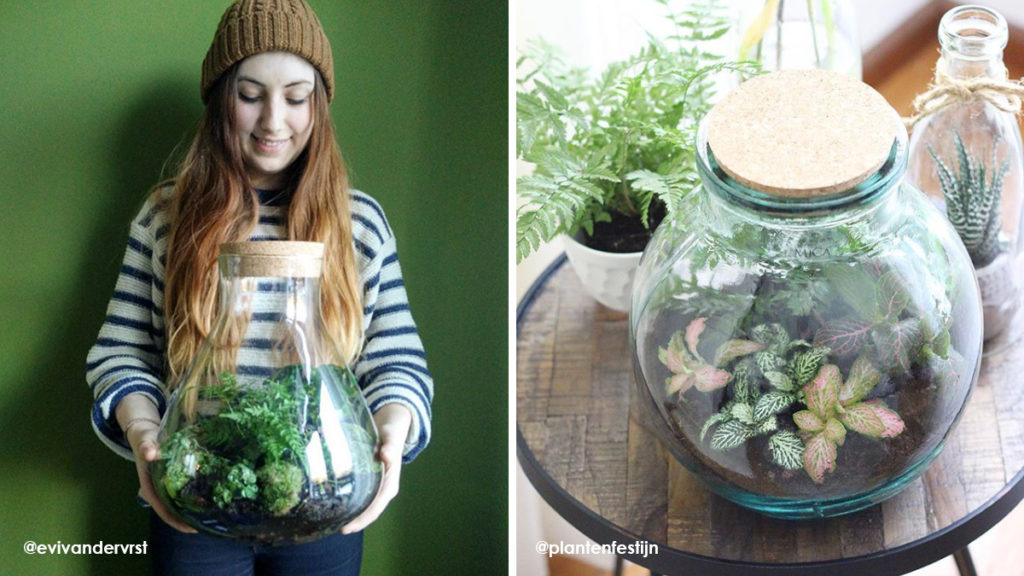
Whether you’re going for a Jurassic Park look, a mossy green romance or something with air plants, all terrariums start with a Mica Decorations vessel of clear, smooth glass that offers the best view of the plants. The container has to be big enough for a few plants and offer an opening that is wide enough to get all the elements in. The advised ratio is 1/3 filled and 2/3 space.
Nature in a bottle
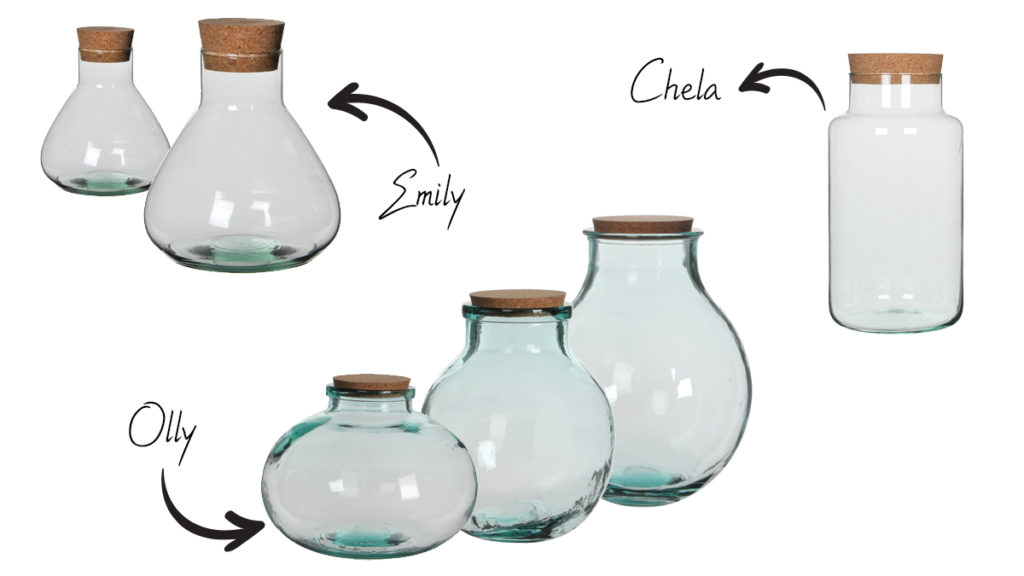
Bottles, pots with lids, lab ware, jars, apothecary bottles, little glass houses, corked cylinder vases, glass ware with an opening on the front, hanging glass containers – at Mica Decorations you are spoiled for choice when it comes to picking a terrarium. There are two types of terrariums: open and sealed. Open terrariums require frequent watering, just like normal houseplants. A well-made closed terrarium takes care of itself, like a miniature biotope that invites you in for a closer look. Here’s a step-by-step guide to make such a natural beauty.
Just like the real thing!
How does one of those miniature atmospheres work? The plants and the soil in the terrarium release water vapour – essentially recycling water. The vapour is then collected onto the walls of the vessel and trickles down to the soil. Leaves that fall off decay on the soil and become plant food, just like in nature. Terrariums are self-nourishing, which is why they require little maintenance, once they’re sealed.
This is what you need
• A large glass planting container in your preferred style by Mica Decorations with an opening wide enough to let the plants pass and a lid or a seal (usually a cork).
• Water, biological green soap.
• Plastic bottle, piece of paper (a simple A4 will do).
• Small bamboo sticks, cake-fork and teaspoons, sticky tape.
• Pebble stones or hydro stones, horticultural charcoal (activated carbon), potting soil, moss and decorative stones or shells.
• Mini-plants that like humid conditions like ferns, Fittonia, carnivorous plants, Calathea, Chloropythum and Spathiphyllum.
Step 1
Clean out your terrarium well with green soapsuds. For difficult to reach spots an aquarium brush can be handy. Rinse thoroughly with hot water, let it dry.
Step 2
Put the terrarium on its side and carefully allow pebbles to roll inside for the bottom layer. These are meant to offer drainage, so the roots of the plants won’t become too wet.
Step 3
Tilt the terrarium upright. Cut off the top of a plastic bottle, fold the paper into a funnel that goes through the opening of the plastic bottle. This way the charcoal and soil will fall neatly on the pebbles.
Step 4
Crumble up enough charcoal to cover the pebbles. Charcoal helps to absorb excess moisture and prevent mold. On top of the charcoal an 8 cm layer of soil. There’s special terrarium equipment to spread everything evenly, but a bamboo stick, a teaspoon and some sticky tape go a long way too.
Step 5
Make two long spoons of bamboo sticks, teaspoons and sticky tape. Tape a small cork to a bamboo stick. Use one of the spoons to dig a small hole in the soil. Take a plant out of its plastic container and shake of as much soil as possible. Gently take it between your two spoons and lower it in its place. Shuffle the soil back, press it lightly with the cork. Depending on the size of your terrarium 3-5 plants suffice. If you’re feeling adventurous add a few seeds of small plants.
Step 6
Cover the rest of the soil with moss, decorative pebbles of shells, add a well-scrubbed figurine or piece of wood if you like. If needed, clean up the inside walls of the container with a small brush. Add some rain water to the terrarium and let it settle in in your favoured spot. It should preferably be light, but with no full sun and not too close to central heating elements. Keep an eye on the soil, it needs to be moist, but not too wet (or too dry).
Step 7
Leave the container open for a week. When your terrarium seems to have reached a nice balance – it should show light condensation – it can be sealed so the system can start developing its very own circle of life. Keep it sealed, only open to let it air when its very warm and there’s lots of condensation inside. A good terrarium maintains itself, it’s pure enjoyment for you.